
First, I need to acknowledge the source and inspiration for the air brushing and piercing work that I have been doing for the past 9 years. In August 2005 I was privileged to see Binh Pho doing his piercing and colouring at the AWGB seminar.
If you haven't checked out his work, I suggest you do so immediately - and then buy his instructional videos!
My intention here is to indicate how I have modified some of the ways Binh Pho uses to mark out work and how my own style is developing.
I use materials and equipment readily available in craft shops for card makers to mark out my work.

Card makers buy sheets of stickers to put onto their cards - and I have found many of them to be perfect as stencils for piercing.
They are relatively inexpensive (from about 80p to 99p for a sheet? - and I sometimes find bargains sold on market stalls for as little as 50p.They need to be outline stickers - not solid shapes.
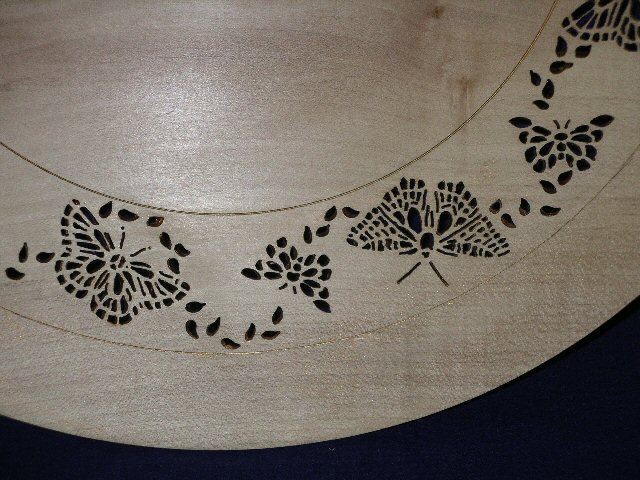
There can be over 30 shapes on a sheet. You need to choose designs that have fairly large areas to cut out. Butterflies, dragon flies and leaves are the ones I like best.
You simply stick them on your prepared surface and pierce through as shown above. If the holes look too small, join 2 or more together.
When I first started piercing, I used a Dremmel and was fairly disappointed with the accuracy of cut until I accepted the discipline of making a simple round hole in each section first, then changing from a drill bit to a small routing bit to enlarge the hole sideways to cut out the shape. Binh Pho recommends using a dental drill and after much searching I managed to get the one he suggested - an NSK Presto air turrbine, air lubricated one. (www.blackforestwood.com) It is a fantastic tool for piercing!
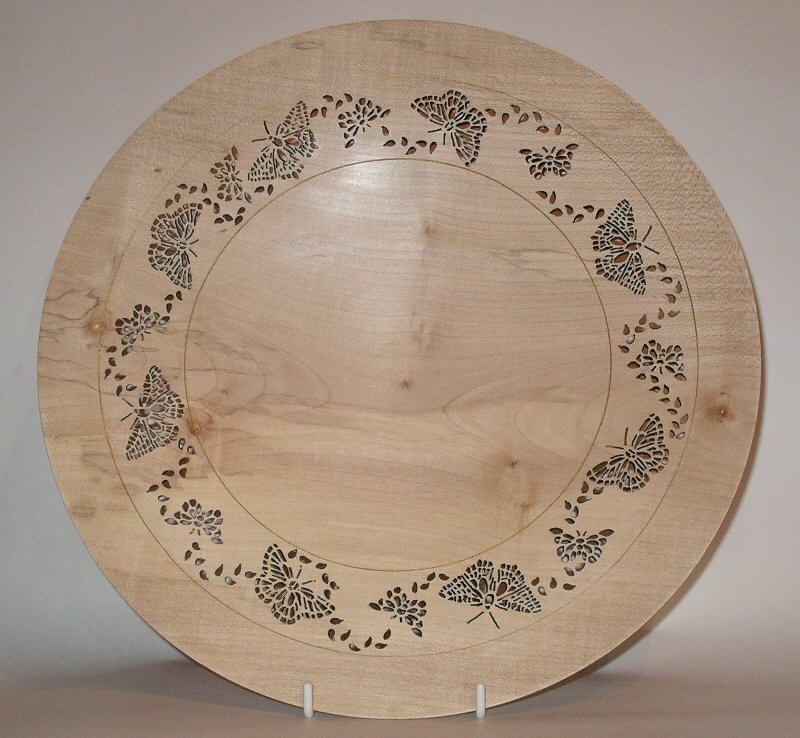
On this platter, which has a diameter of about 35cm, I felt that making the whole dish as thin as it needs to be for piercing (about 2mm) would make it very unstable and make it feel too light. I have therefore developed a technique where I create a recess with a small feature like a bead either side of it (in this one the bead is on the back and there is a 'V' cut filled with gold wax on the front). This allows me to keep most of the platter 4/5mm thick. The piercing stays in this thin band. In this case I have used 16 butterflies of various sizes and designs and linked them with a twining wreath of simple leaf shapes which were cut 'freehand'. (See gallery for larger picture showing the piercing in more detail).
I am also using the stickers to build up more complex pieces. The following piece, which was inspired by a rotting Autumnal woodland floor, pierces the timber nearly to destruction. It is incredibly fragile and almost as ephemeral as the material it reflects.
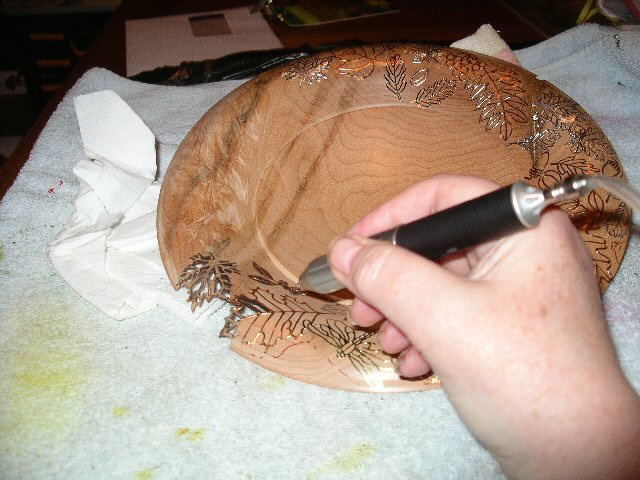
Starting the design - note the stickers are not on the small area of burr. The faint red line indicated the areas of the rim that would be cut away on this 'rolled-edge' piece.
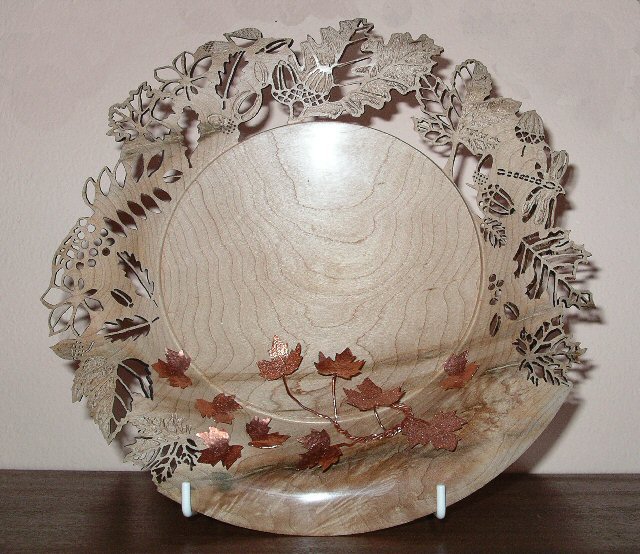
The final stage was to attach leaves that I had crafted in copper to the area left without piercing.
The inside of the pierced shapes is black if you use a dental drill. This actually enhances the work. The back of the piece needs a light hand sanding to remove any 'whiskers'.
If I am only going to pierce a piece, I usually put sanding sealer on it before I start piercing. The final polishing can be tricky on a piece like the one above. I used a small buffing wheel with a little wax polish rubbed into it on my Dremmel to polish the carved areas and hand buffed the central area taking great care to fold in all of the fabric ends so they didn't catch in the fine piercing and destroy it!