I don’t pretend to be anything other than an
average amateur turner. I love my turning, but I have never felt
the need to develop my skills to a point when I didn’t need
my multi-faceted turning tool (ie abrasive!). I can turn a bead
with a skew in the privacy of my own workshop, but cannot make a
series of beads the same size along a piece of wood without a
beading tool. There, I’ve admitted to all and sundry that I
cheat!
I try to turn work that I enjoy and that I would like to keep.
There is nothing special about my traditional turning, but I have
found a couple of useful tips along the way as a result of
numerous disasters and here they are, if you are interested.
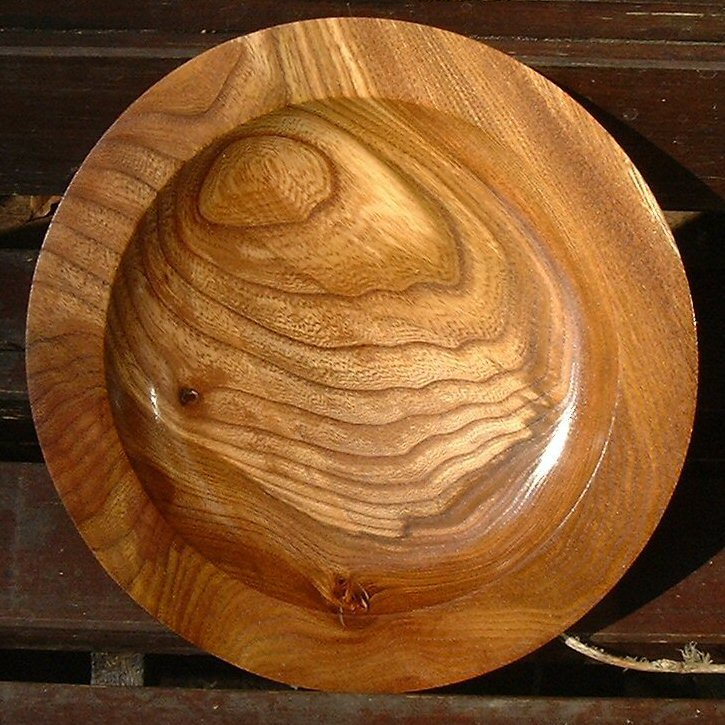
Making sure there is no bump in the bottom of a bowl or
platter.
I make a lot of very thin bowls / platters in dry timber. The
technique for getting thin walls is the same as you would use on
wet wood – you do a small section right down to the
thickness you want and then do the next one. You never try to go
back or you will get chatter (or shatter!!!).
As you progress down the sides of the bowl, you need to keep a
hefty amount of wood in the centre over the chuck to give you
stability and stop the work from flexing and changing shape.
The reason I use dry wood is so that the final shape will be
stable and will not warp enough to notice visibly.
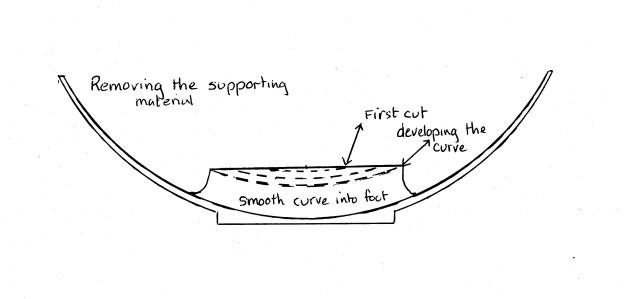
There is a temptation to remove the centre when you get to it and
carry on making the curve from where you have got down the
side.
As I worked towards the centre of a piece I noticed I would be
twisting – but the centre of the twist was not the centre
of the bowl – thus leaving a bump in the centre.
I found that if I took off the waste support material flat (ie
parallel to the rest) and then started to generate the curve from
the centre of this flat area, gradually moving the cut further
out, I got a much better curve, and when I reached the edge of
the flat, I would have one final cut, the same thickness all the
way that blended the 2 curves together.
Perhaps a picture will help:
It is a bit exaggerated - the step that you end up with is
generally about 1mm - but it seems to work - and sinking the
curve into the foot seems to help make the curve a really
satisfying shape!
Torn grain near the foot of a bowl
I like to raise my bowls up from the surface they are sitting on and never use a recess to chuck the piece. On a thin bowl a recess would soon become a hole and instead of a bowl you would have a lamp shade. I try to cut rather than scrape wood and usually get a reasonable
finish from the deep fluted bowl gouges that I use (Henry Taylor
super-flute – basic 45 degree angle – straight grind. I
rarely use a swept-back grind).
However carefully you cut and however sharp the tool, the 5mm
next to the foot is often very difficult to turn without a little
torn grain being visible. A pull cut gets close to the spigot but can tear the grain. A pushing cut from the edge to the middle also tends to tear the grain. You want to cut from the middle outwards to get the cleanest result, but you cannot get to the 5mm or so closest to the spigot.
There are all kinds of scraping tools that can be used to save
the day – my preference is to shear scrape with a Gary
Rance round bar skew chisel with a burr pushed onto the cutting edge with a diamond file (they come in several sizes – I
mainly use the ¼ inch and the ½ inch and aim to
sharpen them straight across with the grinder set up to 30
degrees). The burr is easily removed when you want to use the
tool as a standard skew chisel and I prefer the straight across
grind (without a long point) – it is very versatile.
You really want to cut the wood rather than scrape if possible,
so the old cabinet-makers trick of putting a burr on one side of
the tool by gently sharpening the other side with a diamond file
gives you delightful, tiny perfect shavings when you cut with the
tool at 45 degrees to the wood and the rest level with the middle
of the bowl. It has to be a very light cut – especially
when reverse turning the base of a really thin bowl or
platter!
Beads
As previously mentioned, I cheat! I have never had the
determination to do enough practice to be able to make a row of
identical beads on a piece. My beads have been most successful using Ashley
Isles beading tools – they come in a variety of widths and
do not break the bank!
They have a semi-circular flute which is nearly the same width as
the tool and the end is ground at about a 30 degree angle to form
a point that shows the profile of the bead. It is sharpened by
rubbing a diamond file over the sloping face.
You have the tool rest set at about the middle of the piece and
set the tool on the rest with the flute downwards. This is not intuitively the way you would present the tool, but it is the right way. You then
gently push the tool into the work. I have found that gently
rocking the end of the handle up and down can improve the cut.
If you push too hard until the whole profile of the tool is in
contact with the bead you are cutting, you are likely to pull
splinters of wood off the centre of the bead. Stopping just
before the centre touches the wood prevents this risk and gentle
sanding will complete the bead – or you can raise the
handle to drop the point of the tool below centre to complete the
cut as the centre starts to make contact.